Showing posts with label pictures. Show all posts

Sunday, June 09, 2013

What Happens Next?

Life has been a whirlwind since my last post. It was the first of May - and May ended up being one of the busiest months I've had in a long time. On the 4th of May, my dear friend and sister Kari went home to be with our Lord. She passed very early in the morning, and things were just as she had wanted them: her family all around her, except for her kids, who were each with a non-family "family" member. She didn't want them to have to see her in that state, and it was her wish that they not have to go through that part of it. Things were just as she wanted. She was completely coherent until the moment she went home.

I got to see her on the afternoon before she passed; she was alert and coherent; however she was unable to speak (unless it was *absolutely* necessary). She "spoke" with raised eyebrows or short vocalizations. She just didn't have the energy. And that was ok. Because we all knew that she knew exactly what was happening. I got to talk to her a bit, pray with her and for her. I thank God for that privilege.

The next week was when the whirlwind started. Because Kari was a part of a quartet that we sang in together, we were asked to sing at the memorial service. 4 of us gals got together for a couple days before the service to practice a song to sing. At different points in the quartet's history, there were 5 of us who sang at different points in time. We've become a little family. This quartet is one of the greatest blessings God has given me in music. The song we chose was "Circle of Friends", because 1), she was such an important part of our lives, 2), we knew how large a circle she had touched, and 3), it was a song that we knew and (some of us) had sung before and could prepare quickly. :) What a blessing, to be able to sing at the service, and God held us up through the entire song - we made it all the way through without any tears. I know there's no other way *I* would have made it through. (Thank you Lord!!)

So on Wednesday we had the memorial service at our church, and what an amazing sight to see how many people her life had touched. The place was packed, standing room only. There were probably over 600 people there. There were people from all walks of life, and so many people had wonderful things to say about her and how she touched their lives. I think every one of her girlfriends felt like Kari was her best friend. That's just how she affected people. I'm not usually one to claim a "best friend", except for my husband. But I know that for me, she was definitely one of my best girl friends - really, she was a sister. I've said it before. It's simply true. She was one of the people who I felt knew me for who I *really* am - not who I used to be, and not what they *think* I am. Just who I am, now, who God has made me. I appreciated that so much about her.

The day after the memorial service, 3 friends and I got in a van and drove to Montana, to be with her family at her graveside service on Friday afternoon. It was one of the most amazing times. On the 8-hour drive (each way), the four of us bonded, shared memories about Kari, and had a wonderful time sharing "Kari's Montana" with each other. The weather couldn't have been more perfect, and what a blessing to be counted as her family, *by* her family. We were so blessed.

The graveside service was very special; the pastor of her parents' church gave a wonderful message, and a gentleman sang "It Is Well With My Soul" afterward - what a sound, hearing all these people, including many family members, singing along, and the truth of the song ringing through the air. It really *is* well with my soul. God is in control, and for some reason, unknown to us at this time, has a purpose to taking Kari home at this time in her life. Although we have to now live with that "unknown", we still have peace because we understand that God's plan is perfect. We trust in him. It is will with our souls.

After the service, as is a tradition in their family, the sharpies came out and everyone who wanted to was allowed to write a little note on the casket. That was so special. At first I wasn't sure what to think about it, but as it turned out, it was amazing. What a wonderful way to send off one more last tangible thought - to say one "last word".

Later that day we returned to Kari's parents' house up on the hill...they have a beautiful place. We sat on the porch, visited, just had a good time sharing together. Later that night we got to experience another family tradition: Pinecone Baseball. What a fun time together with this family that we love and that accepted us as part of their family. When the day was over and we drove back to our hotel, we all agreed that it was one of the best. days. EVER.

Honestly, I wasn't sure I really needed to go on this trip, I felt I probably had enough closure at the memorial service. But I'm so glad I went, it was so healing, and a wonderful way to bond with these 3 amazing women who I also count as very dear friends. I am so thankful for them, even more now than ever, since we had the experience together saying goodbye to our friend and sister, Kareen.

The next day was my birthday; my girlfriends took me to breakfast, and then we "crashed" a birthday celebration to surprise Selah (Kari's youngest daughter, born on my birthday 12 years ago). After that, we drove the 8 hours home and again, had a wonderful time together.

Kari's Montana: Circle of Friends

The next three weeks were filled with busy-ness! I'm not complaining; don't get me wrong. Not at all. It was just busy. And honestly, I'm not used to "busy". Life is not usually like this for me. :)

First, there was a Classical Conversations Parent Practicum. In a nutshell, it's a parent teaching session for our homeschool community. That weekend we went to Dallas (Oregon) to the Parker Estate (my parents' house). We celebrated Emma's 14th birthday on Saturday, and took in one of my mom's band concerts. The next weekend was my annual yard sale, which is always fun, and since Kari was always involved with us, it was another few days of memories (and garbage trucks). The week after that was the last week of May (thank goodness!). A couple of those days included homeschool testing. The state requires us to have our kids tested every year. So by the end of that week, which was the end of the month, I was so ready for May to be O-VER.

I know it's silly, it's just that I felt like once May was gone, I could relax a little bit. And it's true - June has been much better so far. :) I still have to get my house clean this week, but I feel like it's a job that can be done without quite such a busy schedule.

So that's it. That's what's happened since my last post.
It's been a whirlwind, but it's ok. It's life. Full of ups and downs!

So here's my question: What happens next?

What happens after you lose a friend and sister?
After so many of your friends have also lost the same friend?
After people who are family to you, have lost a wife and mother?

Well, what happens next, is that we keep on keepin' on. We keep moving forward, we keep living our lives. I will live one day at a time, and see what happens. I'll pray that I can be a good wife and mother, friend and sister, by the grace of God. And I will remember that He is in control.

I will remember that no matter what, this fact remains:

God is good, all the time.

It's just a fact.


Monday, November 19, 2012

It's been a while...

...since my last post.

I know, probably most people don't really even notice. So I'm not worried. I really post on my blog for my own enjoyment and my own sort-of journaling purposes. But anyway, I'd like to post a quick update on life as we know it at the Montgummibear household. This is not, by any stretch of the imagination, a complete or all-encompassing update, but just a few highlights and I will do my best to, sooner than later, post many of the drafts that I've got here in my library of posts, also seen in my mind as things-to-do.

1. This summer we decided to take our kids out of public school and homeschool them. So now I'm not only my kids' first teacher, as I always have been, I'm their actual school teacher too. We're loving this new challenge and really enjoying the time we have together and seeing God's plan for us in the education arena.

2. As a result of No. 1, we get to take fun field trips from time to time, we get to spend more time together, we don't have to get up as early most days, and we are finding new and creative ways to do many of our everyday tasks. Chore break, anyone? Field trip to Target, anyone? King Tut exhibit at Pacific Science Center, anyone? God is good. It's fun, and my kids learn a lot, whether on breaks, field trips (real or imaginary...I know, Target's a stretch...) or in actual "school" study time. :)

3. One of my best girlfriends was recently diagnosed with cancer, so we've really had some interesting changes happen in our family as a result. This family is practically family to us - she is like a sister to me, and all the kids are practically siblings. I'm like a mom to her kids, and she's like a mom to mine. So we do a lot of helping out with picking kids up, and having them over to do school work some afternoons. It's such a blessing to be able to help out this dear friend and her family. It's also a super huge bonus that we "happen" to be homeschooling this year, and our similar-aged kids going through much of the same curriculum. I realized long ago that there are no such things as "coincidence". This is just one example of said "coincidence".

4. God is the Blessed Controller of all things. See No. 1, No. 2, and No. 3.
And No. 5.
And No. 6.

5. There is so much more to update, so I guess I will just do one more. My baby sister Tasha had a baby in March, and she's super cute. Her name is Liliana. They just left from visiting here this weekend.  Lili is 8 months old now, and such a fun, happy baby. Not so much a baby now, since she can crawl around and pull herself up and stand while hanging on to the furniture. You know the age. They're so much fun. If you don't know the age, they're so much fun. Take my word for it, or go find an 8-month-old to watch for a few minutes.

6. I'm tired, and it's getting later and later. So I will have to write more updates another time. Again, there is so much more but I feel like I've at least done my "token" post for now, and hopefully it won't be 7 months between posts again. Or 8 months. Or whatever. One of these days I'll learn to count.

So I will leave you with a picture of my sweet niece, Lili. Or 2. Or 5. I'm telling you, this is the cutest baby *ever*. No lie.


See? I told you.

Friday, March 16, 2012

Homemade Taco Seasoning

I've been meaning to post this taco seasoning recipe for some time now, and since I made up a batch of it the other day, I took a picture or two so I could share! I don't know why exactly, but it's hard for me to share a recipe without a picture.

So without further ado, here is my version of taco seasoning. I love this because I know what's in it, and I know what's *not* in it. No MSG here. :)


Taco Seasoning


Ingredients

2 tablespoons chili powder
1/2 teaspoon garlic powder
1/2 teaspoon onion powder
1/2 teaspoon crushed red pepper flakes
1/2 teaspoon dried oregano
1/2 teaspoon minced onion
1 teaspoon paprika
1 tablespoon ground cumin
2 teaspoons unrefined sea salt
2 teaspoons black pepper


Combine all ingredients in a mason jar and shake until combined.
Store in an airtight container.

You can mix it up directly into an empty spice jar, but I make it in a mason jar so I have enough to store after I fill up my little spice jar.

I usually make up a double batch. Sometimes I make it times four, so I don't have to make up another batch as often. Especially as often as we eat tacos. Watch it though - it's pretty potent - so you don't need to use quite as much as that lame, chemical-ridden store bought taco seasoning.

I use this to season my taco meat, but also when I make quesadillas, I sprinkle this seasoning on top of the cheese/chicken/beans (whatever I put in the quesadillas) to give it some really good flavor. So yummy!

Here's my batch, before shaking...


...and after shaking.


Isn't it pretty? 

Now go on and make yourself some of this yummy stuff!

Sunday, January 08, 2012

Tangy Tomato Soup


After church today I decided to make one of our go-to easy after-church lunches, grilled cheese and tomato soup. Usually, I keep some of those yummy boxes of Pacific Natural Foods tomato soup in the pantry. I looked in the pantry today, and they were all gone! No tomato soup to be found. So I decided I had better try to make some!

I first thought of diluting some tomato paste for the soup base, since I have a can or two of that sitting around. I looked up several recipes for more ideas. Then I remembered that I had canned some tomatoes in the fall, using a recipe from the Ball Blue Book for Roasted Roma Tomatoes. This recipe uses roasted romas, roasted garlic, onion, oregano, salt, and pepper. It was great too, because I had fresh romas from a friend, a bunch of garlic and onions from my CSA box, and fresh oregano from the garden! I love having these things on hand so I can try new recipes.

So far, I hadn't used any of these canned tomatoes yet, and honestly, wasn't sure how I was going to use them up. So now, I know. Whenever I need tomato soup, I'm going to use up my roasted romas to make this yummy soup recipe!

Because I'm not experienced in making my own recipes, I had to share this one. Try it if you want, and if you find a way to make it better, please share it with me!


Tami's Tangy Tomato Soup

Ingredients:

1 Quart Roasted Roma Tomatoes (recipe from Ball Canning Blue Book)
1 tsp Celtic Sea Salt
1 tsp Better than Bouillon Organic Chicken Base
1 C heavy cream


Method:

Pour tomatoes into blender jar and blend the tomatoes until very smooth. Pour blended tomatoes into a saucepan add cream. While heating to desired temperature, add salt, chicken base and cream. Stir and adjust seasonings to taste.

If desired, add fresh ground pepper, basil, parsley, or any other herbs or seasonings you like! I'll bet this is super yummy with some fresh basil thrown in.


Pour into bowls and serve with grilled cheese sandwiches. Yum!


Enjoy!

Friday, September 23, 2011

Italian Prune Cake

Growing up, we had a few prune trees around the place.

I have since come to realize that they are called Italian Prune Plums, and often used to make the dried prunes that we all know and love (?). When most people think "prune" they think of a shriveled up dried fruit that old people eat. :) Really, a dried prune is a dehydrated (mostly) plum. At least as far as I know. And as many of you already know, that's not all too far.

Back to our prune trees on the Parker Estate: we used to eat prunes right off the tree and loved them! That type of plum is so sweet and tart and yummy. After moving away from home, I sort of forgot about them, until a few years ago when we visited down there and realized that the trees had started bearing fruit again after several prunings that left them barren for some time. We brought a couple flats home with us, and enjoyed them while we had them. I didn't preserve any that time, but the next year, Costco had them! I was so excited. It's almost become a tradition to get some whenever they're in season. And it's a *short* season.

These days, the old prune trees back at home are all gone. So whenever Costco carries these prune plums, I grab at least one container for us to eat. This year, for whatever reason, I decided to see if I could make something out of them.

Enter, the prune cake recipe. Yeah. The recipe. This is why you're here, right? The recipe.

I found this recipe online somewhere and modified a bit. Some call it Prune Coffee Cake, some call it Plum Kuchen (a German coffee cake). If you want to drink coffee with it, knock yourself out. I just call it Italian Prune Cake. And sometimes I drink coffee with it.

If you don't have Italian Prunes, then just use some other plums. Whatever works!

Here's what you need:

Cake:
1/2 C butter (one stick)
1 C sugar (I used raw sugar)
2 large eggs
1 C flour (I used wheat pastry flour)
1 tsp baking powder
6 or 7 Italian prunes, pitted and quartered (or more to your liking)
1 Tbsp lemon or lime juice

Topping:
1-1/2 Tbsp Sugar (again I used raw sugar)
1/4 tsp Cinnamon (or just make up some general cinnamon sugar, to your taste)

Directions:
Preheat oven to 350°. Butter a 9-inch springform pan.

Cream together the butter and sugar until well blended. Beat in eggs, followed by flour and baking powder. Beat to mix will and spread into the prepared pan (it's a thick batter). Place plum quarters on top of the batter, close together in circles, covering the batter. Make designs if you want! Sprinkle with lemon juice.

Mix up the cinnamon sugar topping and sprinkle over the top of the plums and batter. Bake on center rack of oven for one hour or until a cake tester or toothpick comes out clean and the top of the cake is golden brown.

Serve warm or cool, preferably with home made sweetened whipped cream (see recipe below).

This is a super yummy cake! The prunes bake down and combine into the batter and are nice and sweet but then you also have the slight tartness of the skin with it -- this is so good. I never thought it would be, but was delightfully surprised.

Here's what the cake looked like before I put it in the oven. I used about 6 prunes on this cake and made little flower patterns. But the last one I made I used 7 or maybe even 8 and put the prunes on in a circular fashion, just around the perimeter and then made circles inside of that big one. I wanted to put on as many as would fit, because when these are cooked into the cake, they are *so* good!


Here's what it looked like after I baked it -- but also after we dug into it. I sort-of forgot to take a shot of what it looked like right out of the oven. So just pretend all the pieces are there.

Since making this recipe twice now, I've frozen a bunch of prunes so that I can make this cake whever I want until they are in season again. (Or until I run out of prunes...)

Hope you have a chance to enjoy this cake! If not, come over to my house and I'll make you some.


:-)


p.s. Here is the whipped cream recipe:

Whipped Cream:
1 C heavy whipping cream
1/4 C powdered sugar
1/2 tsp vanilla


Combine ingredients in a cold mixing bowl (or blender).
Mix until blended and peaks form.
If you prefer unsweetened whipped cream, just whip the cream by itself, or don't add as much sugar. It's up to you to make it how you like it!

Jewelry Display

I put this jewelry holder up last weekend. It's a towel bar and S-hook shower hooks. It's so super easy and so elegant. I love this!

My grandmother gave me a little jewelry holder (pictured below) that I've been using for a long time, but this way I can put each necklace on a separate hook. I'm still using the one she gave me, but now just for bracelets and some of my very cool vintage pins that used to belong to my mother and grandmothers.

The closeup of my newly acquired very-cool-jewelry-holder, looks just like the picture I pinned to my Pinterest board. :)

 Here's the whole thing. So pretty!

 A closeup of the one my grandma gave me a long time ago - super cute!

And this is what it looks like on my wall. It's not centered, because the small one on top is where it was before but the new one wouldn't fit if it was centered. So I don't care. Hee! I absolutely love this. I would have done it sooner, but it took me a little while to find S-hooks shaped shower curtain hooks.

I'm so glad I did!

Friday, August 26, 2011

Zucchini Bread

So, I've had a bountiful harvest of fruits and vegetables this summer due to our CSA - Community Supported Agriculture - box of goodies each week. We've gotten to try many new things, some good and some not-so-good.

This week I got 3 round zucchini squash-y things. They basically looked on the outside like typical green zucchini, but they were round instead. As it turns out, they look pretty much like zucchini on the inside too. I didn't know how I wanted to use them so I obviously turned to Pioneer Woman's website for ideas. I love her. If I lived by her or if she lived by me we would most certainly be very good friends.

I first searched her site, and thought about trying the zucchini cakes that came up when I searched for zucchini, but really had bread in mind so I turned to her Tasty Kitchen website and found this recipe. It's not one she personally posted, but it looked good, and with a title of "The Best Zucchini Bread EVER!", how could I pass it up?!?

So here's a link to the recipe. It's filled with yummy goodness and a lot of cinnamon, which, for picky eaters, hides the look of the zucchini quite well. It tastes great. My family liked it, which means it's a keeper.

The only thing I will do differently next time is to split one recipe up into two loaf pans. I think it will cook better and be less dense. My loaves were huge (almost ran over the pan) and I don't think they cooked as well as they could have if they weren't as full. Of course I will want to watch the cooking time if the pan isn't as full. A little kitchen logic there for ya.

 When you make this recipe, don't forget the tall jar of iced tea. It's just a necessary part of life.


Who doesn't like a nice closeup?

Give this one a try! It's yummy!

Tuesday, August 02, 2011

Sewing

I finally like sewing again.

Here's why.

First, the history: my mom sewed almost all of my clothes when I was young. She even made my prom dresses and my wedding dress. And my bridesmaids' dresses. And I could go on and on.

But I won't. {You're welcome}

I learned how to sew, but since my mom always did the sewing, I never really had to. Earlier this year I finally got rid of an old machine that wasn't working well (and helped create a disdain for anything that had to do with using that machine) and replaced it with a new machine from Costco. I got a great deal too since a), it was at Costco and 2), it was the "floor model", so I got a discount on top of the already good price.


Last weekend I found this sewing table - complete with old (early 60's?) Singer sewing machine. I haven't tried that machine yet, but I was told it works. So I cleaned the table up yesterday and gave it a light coating of Old English, and it looks pretty good. It really needs to be refinished - the stain was chipping off here and there as I was cleaning it. But it will work for now.


I added my knobs to the drawers for my own personal touch, and put my new machine on top. I sewed some little mermaid tail toys for my girls this afternoon and flipped out the top flap of the table on the right side for more table space - it worked out really well. I can't put my machine on top of the existing one when I flip out the left side of the table - it won't fit in the space unless I put some other piece of wood over the top of it. But the way it is for now worked like a charm. I'll most likely be keeping this around for a while.


I think it turned out pretty nicely for ten bucks. And the machine looks in good shape to boot -- I'll be trying it out later and let you know how it goes.


 What shall I sew next?

Wednesday, July 20, 2011

Antiques

I love yard sales. I love to find great deals on stuff that other people want to offload. As a result I sometimes end up with my own "offloads" so I also enjoy spending time with my dear friends having our own yard sale once or twice a year.

A few weeks ago I went out with one of my friends and we both found antique glass door cabinets, they were in a driveway back to back. She looked at one, I was drawn to the other. It was so much fun to find these things!!

So here's mine. It goes great in my entry way. I put my fun kitchen knobs on it instead of the brass-y ones that were on it, and it's perfect.

Enjoy.
I know I do, every time I walk by.

  
Glorious.

Thursday, July 07, 2011

Fun Art

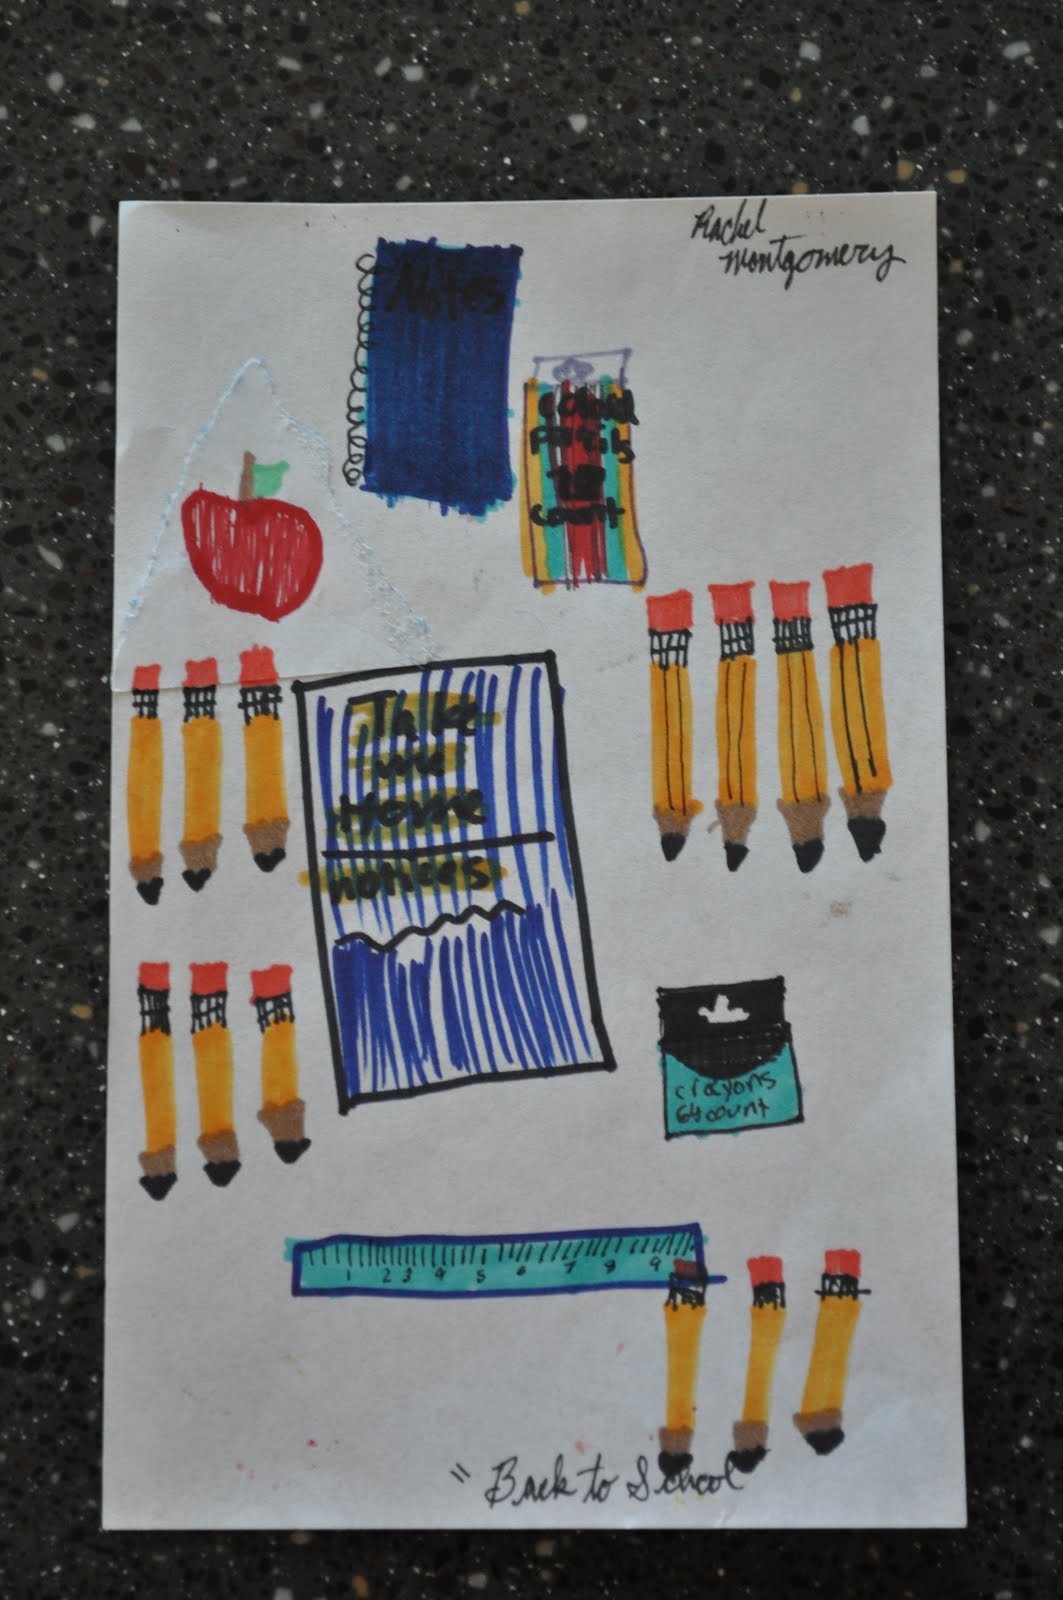
These pictures have been sitting in the basket in the cupboard above my computer desk for months. I've been meaning to somehow get them into a format in which I could keep them for posterity. Yesterday I finally took pictures of them so that I can post them (as I have with past notes and artwork) so I will hopefully always be able to go back and view them whenever I want. I love that I can post things like this on my blog and be able to access them later (as well as sharing the fun things of my life with whomever wants to see them).

So here are a bunch of pictures Rachel drew - sometime this year, but she doesn't remember exactly when.


Monday, May 30, 2011

Elegant Birthday Desserts

Emma's rainbow birthday cake was the dessert for her "friend" birthday party on Friday night, but she wanted another dessert for the "family" birthday party on Saturday.

So she was going to have ice cream cake - and we had been looking at several different recipes. But then we went to the orthodontist and saw a Martha Stewart Living magazine - and found this dessert, so we decided on this instead. Here's magazine picture - I snapped a picture in the orthodontist's office so we would have a quick reference. 

This is what we saw in the magazine. I did *not* make this.
It is super easy and makes a really elegant-looking dessert. It's also really super yummy.

You'll just need a quart of ice cream that you get in a box - whatever flavor you want. Emma opted for one Vanilla and one Neapolitan.

We got some dark chocolate slabs from the bulk food section at WinCo, and I also scooped out some of the little broken pieces to use for sprinkling on the top and around the edges of the finished "cake".

So here are the steps:

First, cut the carton off the ice cream, place it on serving platter, and refreeze until it hardens. Then pour some slightly cooled melted semisweet chocolate over the top, and let it drip down the sides. Now is a great time to scatter some of the chunky bits of chocolate on the top and around the edges of the bottom of the ice cream. Then you will want to refreeze once more so it hardens nicely.

That's it! You have a very elegant looking dessert that was super easy to make.


Neapolitan
Vanilla


I was really impressed at how amazing these desserts looked.

Try this sometime! It's super easy and really yummy.

Rainbow Birthday Cake

Emma turned 12 on May 18. I am now the proud parent of a 12 year old and it's really quite nice to have an "almost" teenager. I don't buy into the "oh no, you have a teenager!" mentality. It simply doesn't have to be "that way". That's just about all I'm going to say about that. :-)

Emma decided she wanted to copy a birthday cake out of her American Girl magazine from several years ago (they really are worth keeping around!). So of course, since I let them both choose what dessert(s) they want for their birthday parties, I agreed to make it for her.

It's really pretty simple, but just takes a bit of time. If I were you, I'd try it sometime. It looks daunting but if you are patient, it will work out. Frosting is a layer-cake-baker's friend, let me tell you.

So here's what you do!

Mix up a plain white cake mix, out of a box - you can make it from scratch if you want to, but it's a bit easier sometimes to just use the box.

After mixing up the cake, split up the batter into 4 even amounts. I used my Pampered Chef 2-cup prep bowls - I'm so glad I got a couple sets of these before I stopped selling PC. Super love these bowls.


You'll color the batter in each bowl a different color - the recipe in the magazine said to use a couple teaspoons of flavored Jello in different colors, but instead of wasting Jello, I just used food coloring. Mr. (Ms.?) Wilton is also a baker's friend. I love him (her?).

Wilton is my friend...
Make the 4 different colors of batter, and then bake each in a well-floured pan. I was reminded that well-floured means exactly that...well-floured. I have this great baking spray, that has flour already in it. I did not realize this until after the first two cakes were baked and they did not come out of the pans very well. I tried to spray them and then flour them - when all I had to do was liberally spray each pan with only the spray that contained flour. This flour spray works great. And, I'll say it again. Frosting is my friend when baking layer cakes. You'd never know that the first two layers came out terribly. I froze them on the rack for a bit first before wrapping them in saran wrap.

These pans were *not* floured nearly well enough. I shouldn't have used flour, just the flour-spray.
Red and Orange cakes
First two cakes didn't come out real well...
Love my prep bowls!!
The second two came out perfectly after cooling for a few minutes.
After all 4 cakes are baked and cooled, you'll want to freeze them. Just wrap them up in saran wrap and let them freeze a while. I baked mine on Thursday and then assembled the cake on Friday. But if you only have a few hours that will do. Cakes are usually easier to frost when frozen - less crumbs. Also, once they are frosted and then thaw, they're nice and moist on the inside. We'll just call that a perk.

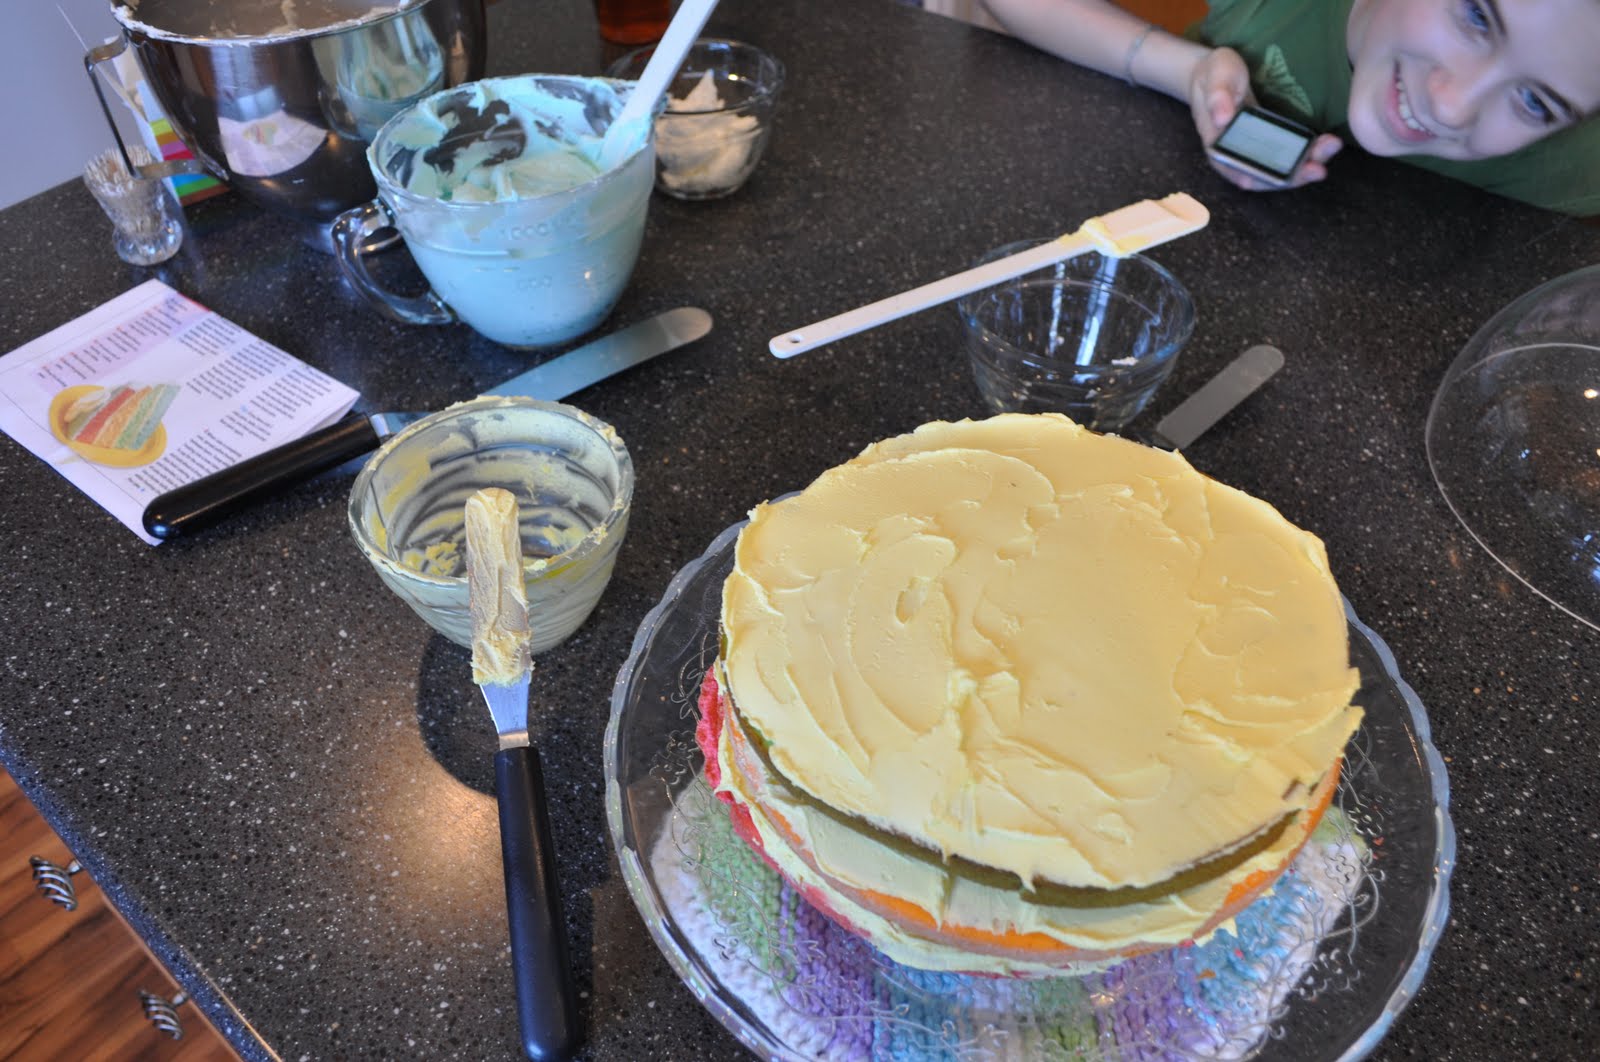
Next it's time to make the frosting. The recipe calls for cans of frosting, but I prefer to make my own. I made a buttercream frosting, and I made a lot since I wasn't sure how much I'd need to "fix" my layers that didn't bake well. Plus, with a layer cake, sometimes the layers aren't exactly perfectly sized, so you need some more frosting sometimes to make the cake look even.


After the frosting is made, you'll want to split it up into 3 portions - leave some white for the clouds, make some yellow for in between the layers, and make some blue for the outside of the cake. I rinsed out one of my 2-cup prep bowls and used it again for the yellow frosting. Have I mentioned how much I love these bowls? I also used my small batter bowl for the blue, since I need more blue than yellow.


Mixing up the blue sky frosting
 

Not quite bright enough...let's add more color...
Perfect.
Beautiful! Frosting is fun.
Now it's time to frost the cake.

Place your bottom layer on your cake serving plate. I got this cute little cake pedestal the last time I went to IKEA. I used to have a cake plate but didn't have room in my old kitchen for it. Now that I have room I decided it was time to have my cake plate again. Anyway, I also put a dab of frosting under that first layer, so when I frosted the cake it wouldn't slide all around. I put a little cloth-y thing under my pedestal so that I could turn it around easily and also to make sure I didn't scratch up my countertop. It's way easier to turn the cake around for frosting all around. You can also put your plate on a lazy susan if you want - I've done that before and it works great.


Then you'll frost the top (only) of the bottom layer with yellow frosting.

 Then the next layer,


And so on.


You'll only need enough yellow frosting for the 3 bottom layers, since the top layer will be frosted with blue.


Next you'll frost the rest of the cake! It can be messy, but put a big glob on and start spreading. Do the top first, then the sides, then you'll smooth out the top again. You can glob some into the uneven places so the cake will look nice and even and smooth. You'd never know that my two bottom layers didn't turn out of the pans very nicely.


After the frosting is done, you can clean up the serving plate with paper towels (or whatever tool you want to use). Next comes the clouds - just spread some blobs of white frosting so that they look like clouds. I wasn't sure how mine would turn out, but I think they ended up looking fairly good. Any shape of clouds will do.


Birthday Girl
Silly Birthday Girl.
My example
That's it. I left the cover off of the cake pedestal until after we cut the cake, since it would have touched the top layer and messed up my clouds. When we cut the cake to serve it, it was super moist and yummy. Layer cakes are slightly time-consuming, but are really simple to put together, so don't let yourself be overwhelmed by the prospect.


Emma's other dessert (for Saturday's family birthday party) was really fun, elegant-looking, and easy to make too...stay tuned for that one.

Yum!